-
Portable Hardness Tester
-
Portable Leeb Hardness Tester
-
Hardness Tester
-
Ultrasonic Thickness Gauge
-
Concrete Test Hammer
-
Brinell Hardness Testing
-
Rockwell Hardness Tester
-
Vickers Hardness Tester
-
Gloss Meter
-
Color Difference Meter
-
Metallurgical Microscope
-
Surface Roughness Tester
-
Ultrasonic Flaw Detector
-
Portable Vibration Meter
-
 Paul FrameThank you very much for all your help regarding the SADT Concrete Hammer and hardness tester which are working well and we are very pleased with it.
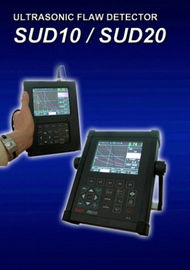
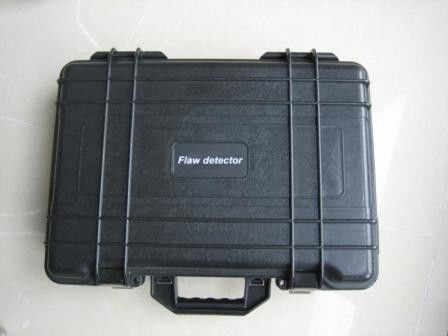
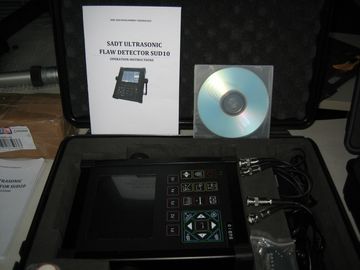
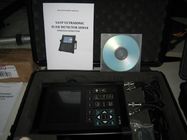
IP65 Automatic Calibration SUD10 Portable Ultrasonic Flaw Detector Embeding Software to PC
| Measuring Range (mm) | 0.5~10000 | Sensitivity Margin | ≥60dB |
|---|---|---|---|
| Measurement Mode | Single, Dual, THRU | Reject | 0~80% |
| Dimension | 240mm×180mm×50mm | Net Weight | 1.8kg |
| Continue Working Time | 10h | Standards | JB/T 10061-1999, JJG 746-2004 |
| Highlight | ultrasonic flaw detector,digital flaw detector |
||
IP65 Automatic Calibration SUD10 Portable Ultrasonic Flaw Detector Embeding Software to PC
SUD series ultrasonic flaw detectors are portable, microprocessor-based instruments that are suitable for both shop and field use. They are integrated with international advanced digital integration and new EL display technology, are smart Digital Ultrasonic Flaw Detector propelled by SADT. SUD series flaw detectors have almost all functions to meet requirements of professional application for nondestructive testing.
SUD10 digital ultrasonic flaw detector can be quick and easy, noninvasive, accurate manner workpiece internal faults such as cracks, weld, stomatal, trachoma, inclusions, folded and so on.
Features:
· Automatic calibration of transducer Zero Offset and/or Velocity ;
· Automatic gain, Peak Hold and Peak Memory;
· Automatic display precise flaw location (Depth d, level p, distance s, amplitude, sz dB, ф);
· Automatic switch three staff gauge ((Depth d, level p, distance s);
· 100 independence setup, any criterion can be input freely, we can work in the scene without test block;
· Big memory of 300 A graph and 30000 thickness value.
· Gate and DAC alarm;Acoustic-Optical alarm;
· RS232/USB port, communication with pc is easy;
· The embeded software can be online updated;
· Li battery, continue working time up to 8 hours;
Display freeze;
Automated echo degree;
Angles and K-value;
DAC, AVG , TCG , B Scan ;
AWS;
Solid metal housing (IP65);
Automated calculate the size of the flaw with w ide bottom type in AVG function.
6dB DAC functions;
Provides high contrast viewing of the waveform from bright, direct sunlight to completae darkness and easy to read from all angles;
Powerful pc software and reports can be export to excel;
Technical Parameters
| Designation | Technical Data |
| Range of scanning (mm) | Range of scanning (mm): 0~10000 Steps: 2.5,5,10,20, 30,40,50,60,70,80,90, 100,150,200, 250, 300, 350, 400, 450,500,600,700,800,900,1000,2000,3000,4000,5000,6000,7000,8000,10000 Adjusting step: 0.1mm(2.5 mm~99.9mm), 1mm(100mm~10000mm) |
| D-delay (µs) | D-delay (µs): -20~+3400 Steps: -20,-10,0.0, 10, 20, 50,100,150,200,250,300,350,400,450,500, 600, 700,800,900,1000,1500,2000,2500,3000,3400. Adjusting steps: 0.1(-20µs~999.9µs), 1(1000µs~3400µs) |
| P-delay (µs) | P-delay: 0.0~99.99 Adjusting steps: 0.01 |
| MTLVEL(m/s) | MTLVEL: 1000~15000 10 fixed levels: 2260,2730,3080,3230,4700,5920,630012000,13000,14000,15000 Adjusting steps: 1 |
| Working mode | Single probe (receiving and sending), double probe (one for receiving and another for sending), transmission (transmission probe) |
| Frequency Range (MHz) | 0.5~20 |
| Gain adjustment (dB) | 0~120 Adjusting step: 0.0, 0.1, 0.5, 1, 2, 6, 12 |
| Reject | 0%~80% of screen height, step: 1% |
| Vertical linear error | Vertical linear error is not more than 3% |
| Horizontal linear error | Not more than 0.2% in the scanning range |
| Sensitivity Leavings | ≥62 dB |
| Dynamic range | ≥34dB |
| Alarm | Three modes, i.e. forbidden wave, loss wave and auto |
| A-Scan display area | Full screen or local A-Scan display freezing and de-freezing A-Scan filling |
| Data save | 300 A-Scan images (including setting of instrument) |
| Standard communication interface with PC |
RS232/USB |
| Measuring unit | mm/inch |
| Battery | Li battery 7.4V 4800mAh |
| Power adaptor | Input 100V~240V/50Hz~60Hz Output 9VDC/1.5A |
| Working temperature | -20℃~50℃ |
| Working humidity | 20%~90% |
| Port type | BNC |
| Overall dimension (mm) | 50×180×240 |
| Weight (kg) | 1.8 |
![]()
![]()
![]()
![]()
![]()
![]()
![]()
![]()


